Well, this is taken from my last blog, because right now I don’t have a lot of time to write a giant long tutorial post. Sorry! But for those of you who haven’t read it before, I guess it doesn’t really matter. Anyway.
So, I trimmed my sweetie doe’s hooves yesterday. I figured since when I got my first goat, it was hard for me, that I would post pictures and instructions to go with them. So, I will now present to you…
How to Trim Goat Hooves. *Keep in mind that I do not cut way down, almost to the quick. I feel that if I cut some flesh off and some wall they will be good for at least the next five months.*
What you need:
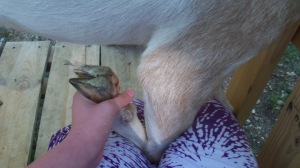
1. First, you want to get the right hold on the goat’s hoof. You cannot do it grudgingly or you will slice yourself open, so it actually is important. You can wear gloves, I know many do, but I don’t. I feel as if I have more control without gloves. For the front feet, I hold them like this. My legs cradle the goat’s leg to where I can see the hoof and she doesn’t fall.
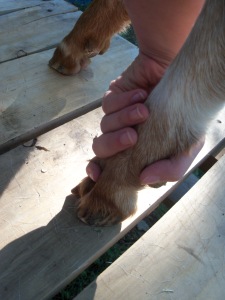
2. For the back feet, I hold like this, and pull the foot out from behind her. Yes, the goat will probably kick, that is just the way it is. Just hold on to it and wait for a time when she/he stops. :
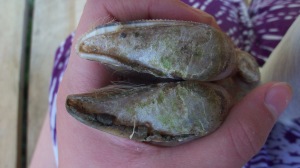
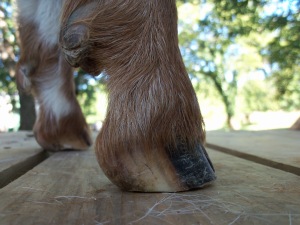
3. Second, you want to kind of investigate the hoof, see what needs to be done. Alice hasn’t been trimmed in about 6 months, her hooves weren’t too bad. If a goat had very over grown hooves, be very careful, because the quick goes further up and is easier to cut. You might have to do it in multiple sessions.
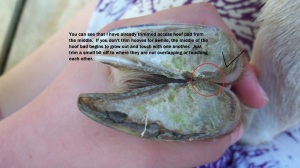
If there is any hoof wall curling over, you need to cut that off straight away. First, start with one side, and just level the hoof to where nothing is overlapping anything or sticking out. I have already cut one side in this picture, but I wasn’t finished. There was still quite a bit of extra hoof wall to cut off in this picture.
4. Once you level one side off you can start on the next. Level that off the exact same way you did with the other. The back of the hoof pad may be growing towards the middle. You can cut the quick easily back here, so don’t take a lot off. Just a smidge, and go from there.
5. This is where you can start trimming access hoof pad off. Not the wall, the actual flesh. I used to get very freaked out over this, and as a newbie, I didn’t do it because I didn’t know you should. Well, it’s easier than you think. At the hoof point, there is usually quite a bit of extra flesh there. So, at the very point, angle your hoof trimmers up, and cut the tip off. Remember, not enough is better than too much, so just go tiny bit by tiny bit. That way, you don’t have a good chance of hitting blood. Once you see pink, if you do, STOP. That is the quick, like on a dog’s toenails. This isn’t so important that you need to go as far as you can. I never do. I just go until we are both comfortable, because I am a softie when it comes to hitting the quick. Especially when it’s my baby, Alice.
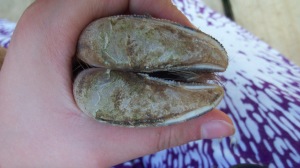
This is a finished hoof.
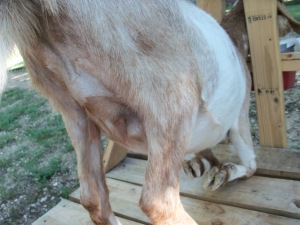
And here is a stubborn Alice who was not happy with me once we were done.
Any questions or additives, feel free to comment.
*Oh, new accomplishment for me, I did this all in a nice dress.
 Here’s how you do it correctly. Pictures are ordered in the same way as the steps.


